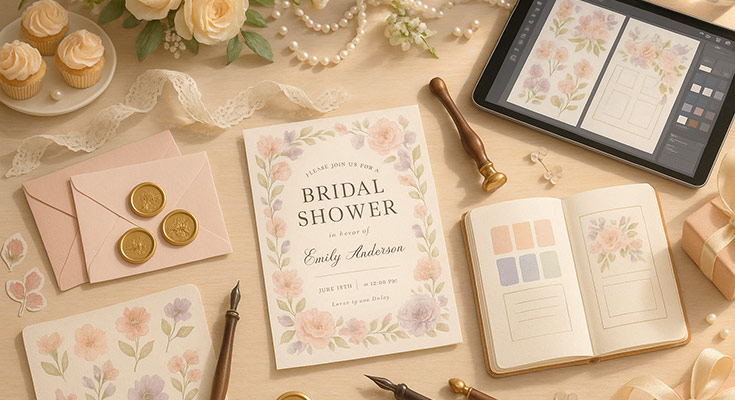
Creating the perfect bridal shower invitation sets the tone for one of the most cherished pre-wedding celebrations. When you learn how to make bridal shower invitation yourself, you’re not just saving money – you’re crafting a personalized piece that reflects the bride’s unique style and the love surrounding her special day. Unlike generic store-bought options, handmade invitations, especially when guided by resources like these bridal shower invitation templates, tell a story and create anticipation that guests will remember long after the celebration ends.
In this comprehensive guide, you’ll discover everything needed to create stunning DIY bridal shower invitations from start to finish. Whether you’re planning digital designs, elegant handmade creations, or printable templates, we’ll walk through each step with detailed instructions, professional tips, and creative inspiration. You’ll learn about essential materials, design techniques, personalization strategies, and production methods that ensure your invitations look professionally crafted while maintaining that special personal touch.
What Materials Are Needed to Create Bridal Shower Invitations?
Success in creating beautiful custom bridal shower invitations begins with selecting the right materials. Having quality supplies ensures your finished invitations look professional and feel substantial in recipients’ hands. The materials you choose will depend on your design approach, budget, and the overall aesthetic you want to achieve.
Essential Paper and Cardstock Selection
The foundation of any great invitation starts with quality paper. For handmade bridal shower invitations, choose cardstock weighing between 110-130 GSM for the main invitation base. This weight provides durability without being too thick for standard mailing. Popular paper types include smooth cardstock for crisp printing, textured cardstock for added elegance, and specialty papers like linen or felt finishes that add sophistication.
Consider color carefully when selecting your base materials. Classic options include ivory, cream, and soft white, which work beautifully with most color schemes. For themed celebrations, incorporate the bride’s favorite colors or wedding palette. Metallic papers in gold, silver, or rose gold create luxurious foundations for elegant designs.
Layer papers add dimension and visual interest to your invitations. Choose complementary colors in lighter weights (80-100 GSM) for overlay elements. Vellum creates romantic, translucent effects, while metallic accent papers highlight important information like dates and locations.
According to the University of Oregon’s Output Room FAQ, standard laser printers can safely accommodate up to 80 lb cardstock, though coated or plastic-coated stocks may cause toner adhesion issues or printer jams—so it’s important to select fiber‑based cardstock that matches printer specifications.1
Design Tools and Software Options
Digital design capabilities have revolutionized bridal shower invitation design. Free platforms like 1Invites offer user-friendly interfaces with drag-and-drop functionality, perfect for beginners. The platform includes hundreds of bridal shower invitation templates that can be customized with personal photos, colors, and text.
For more advanced control, Adobe Creative Suite programs like Illustrator and InDesign provide professional-grade tools. For a comprehensive overview of digital design options, check out our digital invitation maker complete guide. These programs offer precise typography control, advanced layering capabilities, and high-resolution output options essential for professional printing. Photoshop excels at photo manipulation and creating unique background effects.
Mobile users can create stunning invitations using smartphone apps. 1Invites mobile app, Adobe Express, and PicMonkey all offer robust design capabilities on the go. These apps sync across devices, allowing you to start designs on your phone and finish them on your computer.
Embellishment and Decorative Materials
Transform simple invitations into memorable keepsakes with carefully chosen embellishments. Ribbon remains one of the most versatile decoration options. Satin ribbons in coordinating colors add elegance, while burlap or twine ribbons work perfectly for rustic themes. Calculate approximately 12 inches of ribbon per invitation for standard bow applications.
Decorative papers expand your creative possibilities significantly. Scrapbook papers offer endless patterns and textures, from delicate florals to geometric designs. Washi tape provides colorful accents and can frame text or photos beautifully. Doilies add vintage charm, particularly for teaparties or garden party themes.
Consider three-dimensional elements for added impact. Pearl or rhinestone stickers create elegant focal points. Silk flowers or dried botanicals work wonderfully for garden or botanical themes. Laser-cut designs in wood or cardstock add sophisticated architectural elements to your design.
Printing Equipment and Alternatives
Home printing offers convenience and cost control for printable bridal shower invitations. Inkjet printers work well for photographs and colorful designs, while laser printers excel at crisp text and line art. Ensure your printer can handle cardstock thickness – most home printers accommodate up to 110 GSM cardstock without issues.
Professional printing services provide superior quality for special occasions. Local print shops offer personalized service and can handle specialty papers and finishes. Online printing services like Vistaprint or Moo provide professional results with convenient online ordering and delivery options.
Consider hybrid approaches for optimal results. Print invitation text professionally while adding handmade embellishments at home. This combination provides crisp, professional text with personal touches that show your care and attention to detail.
What Are the Step-by-Step Instructions for Creating Digital Bridal Shower Invitations?
Digital bridal shower invitations offer incredible flexibility, cost-effectiveness, and environmental benefits while maintaining a professional appearance. The digital approach allows for easy customization, quick distribution, and the ability to track RSVPs efficiently. Learn more about tracking RSVP responses online easily to streamline your event planning.
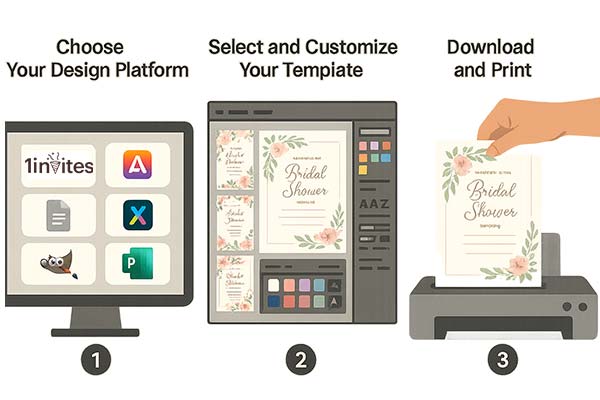
Choose Your Design Platform
Selecting the right design platform sets the foundation for your invitation creation process. 1Invites stands out as the most user-friendly option for beginners, offering thousands of pre-designed templates specifically for bridal showers. The platform includes built-in collaboration features, allowing multiple people to contribute to the design process. Free accounts provide substantial functionality, while premium accounts unlock additional fonts, graphics, and template options.
Adobe Creative Suite offers professional-grade capabilities for users comfortable with more complex software. Adobe Express provides a middle ground with professional tools in a simplified interface. These platforms excel at creating unique, completely custom designs that don’t rely on template structures.
For users seeking completely free alternatives, Google Drawings and Microsoft Publisher provide basic design capabilities. While limited compared to dedicated design platforms, these tools can create attractive invitations with patience and creativity. GIMP offers advanced photo editing capabilities as a free alternative to Photoshop.
Consider your comfort level with technology when making platform selections. User-friendly interfaces save time and frustration, while advanced platforms provide greater creative control. Many designers start with simple platforms and graduate to more complex tools as their skills develop.
Select and Customize Your Template
Bridal shower invitation templates provide excellent starting points for your design journey. When browsing templates, consider the celebration’s theme, the bride’s personality, and the overall wedding aesthetic. Floral templates work beautifully for garden parties, while geometric designs suit modern celebrations. Vintage templates complement tea parties or retro-themed events.
Customization transforms generic templates into personalized creations. Start by updating the color palette to match the bride’s preferences or wedding colors. Most platforms allow easy color adjustments through simple click-and-change interfaces. Maintain consistency by using no more than three primary colors plus one or two accent colors.
Typography plays a crucial role in invitation effectiveness. Choose fonts that reflect the celebration’s mood – elegant script fonts for formal events, clean sans-serif fonts for modern celebrations, or playful fonts for casual gatherings. Ensure text remains readable at various sizes, particularly for older guests who may need larger text. For more design guidance, explore our comprehensive invitation card design tips guide.
Incorporate personal elements that make invitations special. Add the bride’s favorite photos, quotes that reflect her personality, or design elements that reference shared memories. Personal touches transform invitations from announcements into keepsakes that guests treasure.
Download and Print
Preparation for printing requires attention to technical specifications that ensure professional results. Set your design to 300 DPI (dots per inch) for crisp, clear printing. This resolution prevents pixelation and ensures text remains sharp when printed. Most design platforms automatically optimize for printing, but verify settings before finalizing.
Choose appropriate file formats for your intended use. PDF files maintain formatting consistency across different devices and printers, making them ideal for professional printing. PNG files work well for home printing and maintain transparent backgrounds if needed. JPEG files offer smaller file sizes for email distribution but may lose some quality.
Consider bleed requirements if using professional printing services. Bleed refers to extending design elements beyond the final cut size to ensure no white edges appear after trimming. Most professional printers require 0.125-inch bleeds on all sides. Design platforms often include bleed settings in their print preparation options.
Test print on regular paper before committing to expensive cardstock. This allows you to check colors, alignment, and overall appearance without wasting premium materials. Many home printer colors appear differently than screen colors, so test printing helps achieve the desired results.
How Do You Craft Handmade Paper Bridal Shower Invitations?
Creating handmade bridal shower invitations offers unmatched personalization opportunities and creates truly unique keepsakes for the bride and guests. If you’re new to invitation making, our guide on how to make an invitation card covers fundamental techniques. The hands-on approach allows for creative freedom and ensures each invitation reflects the care and thought put into the celebration planning.
Cutting and Preparing Your Base Materials
Precision in cutting creates the foundation for professional-looking handmade invitations. Start with high-quality cardstock in your chosen base color, typically measuring 5″x7″ or 4.25″x5.5″ for standard envelope compatibility. Use a paper trimmer or craft knife with a metal ruler for straight, clean edges. Rotary cutters work excellently for multiple invitations, ensuring consistent dimensions across your entire batch.
Create templates from cardboard or heavy paper to ensure consistency across multiple invitations. Trace around templates rather than measuring each piece individually, which saves time and improves accuracy. Mark light pencil lines on the back of materials to guide cutting without visible marks on the finished product.
Consider grain direction when cutting cardstock, particularly for folded invitations. Paper folds more cleanly along the grain, creating crisp fold lines without cracking. Test fold a small piece to determine grain direction before cutting your entire batch.
Prepare work surfaces with cutting mats to protect tables and ensure clean cuts. Good lighting prevents eye strain and improves cutting accuracy. Organize materials in the order you’ll use them to maintain an efficient workflow throughout the creation process.
Layering Techniques for Dimensional Effects
Layering creates visual depth and sophistication in bridal shower invitation design. Start with your base cardstock, then add progressively smaller pieces to create borders and focal points. Use photo mounting squares or double-sided tape for clean adhesion without visible glue marks.
Create interesting layering effects using different textures and colors. Combine smooth cardstock with textured papers, or add metallic accents to highlight important information. Vary layer sizes to create balanced compositions – avoid layers that are too similar in size, which can appear unintentional.
Consider elevation in your layering approach. Foam adhesive squares lift certain elements above others, creating shadow effects that add dimension. This technique works particularly well for highlighting the bride’s name or important event details.
Plan your layering order before beginning adhesion. Work from background to foreground, ensuring each layer is properly positioned before adding the next. This prevents repositioning that can damage delicate papers or leave adhesive residue.
Adding Embellishments and Decorative Elements
Embellishments transform basic invitations into memorable works of art. Choose elements that complement rather than overwhelm your design. Custom bridal shower invitations benefit from restraint – select two or three embellishment types for cohesive, elegant results.
Ribbon applications offer versatile decoration options. Create simple bows for classic elegance, or weave ribbon through slits for more complex designs. Secure ribbon ends with small dots of craft glue, ensuring attachments remain invisible. Consider ribbon placement carefully – centered applications work for formal designs, while off-center placement creates more dynamic, modern looks.
Decorative punches create consistent, professional-looking elements. Heart punches work beautifully for romantic themes, while butterfly or flower punches complement garden party celebrations. Use punched elements sparingly for maximum impact, clustering them in corners or using them to frame text.
Consider three-dimensional flowers or botanicals for organic appeal. Silk flowers can be disassembled and individual petals used for delicate accents. Dried flowers and leaves create beautiful pressed flower effects, particularly for outdoor or garden-themed celebrations.
Assembly and Finishing Touches
Systematic assembly ensures consistency across your invitation batch. Create an assembly line approach, completing one step across all invitations before moving to the next step. This method improves efficiency and maintains quality consistency.
Quality control checks prevent errors from reaching guests. Review each invitation for proper spelling, alignment, and secure adhesion before considering it complete. Check that all embellishments are firmly attached and that no smudges or marks detract from the overall appearance.
Consider protective measures for delicate invitations. Tissue paper inserts prevent embellishments from catching on each other during mailing. Clear protective sleeves maintain pristine condition during handling and transportation.
Final touches might include light pencil erasing to remove any construction marks, gentle pressing under heavy books to ensure flat mailing, and careful inspection under good lighting to catch any missed details or imperfections.
How Do You Personalize Your Bridal Shower Invitations for Maximum Impact?
Personalization transforms standard invitations into meaningful keepsakes that reflect the bride’s unique personality and the special nature of the celebration. Bridal shower invitation wording and design elements should tell the bride’s story while creating excitement for the upcoming event.

Adding Photos and Personal Touches
Incorporating photographs creates instant emotional connections and makes invitations truly special. Choose high-resolution images (300 DPI minimum) that capture the bride’s personality or significant moments. Engagement photos work beautifully for romantic themes, while candid shots of the bride laughing or enjoying favorite activities add personal warmth.
Consider photo placement carefully within your design layout. Central placement creates focal points, while corner or border placements complement text without overwhelming it. Ensure sufficient contrast between photos and text to maintain readability. Add subtle borders or frames around photos to integrate them seamlessly into the overall design.
Create photo collages for brides with rich visual histories. Multiple smaller photos can tell stories about friendships, adventures, or milestones. Use consistent sizing and spacing for professional results. Digital platforms offer automated collage tools that maintain proper proportions and spacing.
Personal touches extend beyond photographs to include meaningful quotes, inside jokes, or references to shared experiences. Include the bride’s favorite inspirational quote, lyrics from her favorite song, or a funny saying that captures her personality. These elements create intimate connections between the invitation and the bride’s character.
Incorporating the Bride’s Favorite Colors and Interests
Color psychology plays a significant role in invitation effectiveness and emotional impact. Research the bride’s favorite colors and understand their emotional associations. Soft pastels create romantic, dreamy atmospheres, while bold, vibrant colors suggest fun, energetic celebrations. Maintain balance by using one or two primary colors with neutral accents.
Extend color coordination beyond the invitation to include envelope liners, address labels, and any additional inserts. This comprehensive approach creates a cohesive presentation that impresses recipients from the moment they receive their invitation. Consider seasonal appropriateness – spring celebrations benefit from fresh greens and soft pinks, while fall events suit warm oranges and deep reds.
Incorporate the bride’s interests through subtle design elements that reflect her personality. Book lovers appreciate literary quotes or vintage library-inspired designs. Travel enthusiasts enjoy map backgrounds or destination-inspired elements. Garden lovers respond to botanical illustrations or pressed flower accents.
Hobby integration can extend to invitation shapes and formats. Music lovers might appreciate invitations designed as vintage records or concert tickets. Art enthusiasts could receive invitations that mimic gallery exhibition announcements. These creative approaches demonstrate thoughtfulness while creating memorable experiences.
Using Custom Fonts and Typography
Typography significantly impacts invitation readability and aesthetic appeal. Choose fonts that reflect the celebration’s mood and the bride’s personality. Elegant script fonts work beautifully for formal, traditional celebrations, while modern sans-serif fonts suit contemporary, minimalist themes. Avoid using more than two different fonts to maintain design cohesion.
Consider font hierarchy to guide readers through information logically. Use larger, bolder fonts for the bride’s name and event type, medium fonts for dates and locations, and smaller fonts for additional details like RSVP information. This hierarchy helps guests quickly identify essential information.
Ensure font legibility across different ages and vision capabilities. While decorative fonts add personality, essential information should remain easily readable. Test font sizes by printing samples and asking others to review readability. Minimum 12-point font sizes work best for most guests.
Custom lettering adds a unique, handcrafted appeal to invitations. Hand lettering the bride’s name or event title creates focal points that demonstrate special care. If hand lettering seems intimidating, consider hiring a local calligrapher or using digital calligraphy fonts that mimic handwritten styles.
Creating Matching Envelope Designs
Envelope design creates first impressions and builds anticipation before guests even open their invitations. Coordinate envelope colors with invitation designs using complementary or matching colors. Colored envelopes cost more than standard white but create a significant visual impact that justifies the investment.
Address envelopes using fonts and styles that complement invitation designs. Hand lettering creates luxurious, personal touches, while printed address labels in coordinating fonts maintain consistency with less time investment. Consider hiring professional calligraphers for special occasions or learning basic calligraphy techniques for personal satisfaction.
Envelope liners add sophisticated finishing touches that surprise and delight recipients. Create liners using coordinating papers or patterns that complement invitation designs. Liners can incorporate elements from the invitation design, creating a cohesive presentation throughout the mailing package.
Return address design opportunities include custom stamps, embossed return addresses, or printed labels that coordinate with invitation aesthetics. These details demonstrate attention to every aspect of the invitation experience and create cohesive branding for the celebration.
What Are the Best Printing and Production Methods for DIY Invitations?
Choosing appropriate printing methods ensures your printable bridal shower invitations look professional while staying within budget constraints. Understanding different options helps you make informed decisions that balance quality, cost, and convenience for your specific project needs.
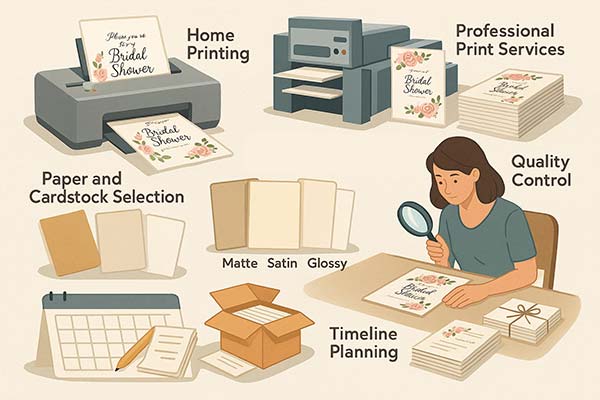
Home Printing vs. Professional Print Services
Home printing offers convenience, cost control, and immediate results for DIY invitation projects. Modern inkjet and laser printers produce excellent results on quality cardstock, making professional-looking invitations achievable at home. Inkjet printers excel at photo reproduction and vibrant colors, while laser printers provide crisp text and consistent results across large batches.
Consider your printer’s cardstock handling capabilities before beginning production. Most home printers accommodate 110 GSM cardstock comfortably, while heavier weights may cause jams or feeding issues. Test print single sheets before committing to entire batches to avoid wasting expensive materials.
Professional printing services provide superior quality, specialized finishing options, and expertise in paper handling. Local print shops offer personalized service, allowing you to discuss paper options, color matching, and finishing techniques directly with experienced professionals. They can handle specialty papers, foil stamping, embossing, and other premium finishes not available with home printing.
Online professional printing services combine convenience with professional quality. Services like Vistaprint, Moo, or local online printers offer competitive pricing, quick turnaround times, and convenient delivery options. Many provide design services or template customization if you prefer professional assistance with design elements.
Cost considerations vary significantly between home and professional printing. Home printing requires equipment investment and ongoing ink/toner costs, but provides per-unit savings for small batches. Professional printing offers economies of scale for larger quantities and eliminates equipment maintenance concerns.
Paper Selection for Different Printing Methods
Paper selection dramatically impacts final invitation quality and printing success. Inkjet printers work best with papers designed for ink absorption, preventing smudging and ensuring vibrant color reproduction. Look for papers labeled “inkjet compatible” or “photo quality” for best results with photographic elements.
Laser printers require papers that withstand high heat without warping or melting. Most cardstocks work well with laser printers, but avoid papers with plastic coatings or very heavy textures that might interfere with toner adhesion. Laser printing provides exceptional text clarity and works excellently for text-heavy designs.
Specialty papers require careful consideration of printing compatibility. Metallic papers may require specific printer settings or may not work well with certain printer types. Textured papers can interfere with print quality, creating uneven text or color coverage. Always test small samples before purchasing large quantities of specialty papers.
Consider the paper finish effects on the final appearance. Matte finishes reduce glare and provide elegant, sophisticated looks. Glossy finishes enhance photo reproduction and create vibrant color displays. Satin finishes offer a compromise between matte and gloss, providing some reflection without excessive shine.
According to the EPA’s paper procurement guidelines, different paper types—such as offset paper, cover stock, and bond/envelope paper—must meet minimum recycled-content standards (typically ≥ 30% postconsumer fiber), while performance specifications like brightness and weight should be tailored to the specific printing method (e.g., inkjet, laser, offset) to ensure compatibility and quality.2
Quality Control and Final Inspection
Systematic quality control prevents disappointing results and ensures consistent standards across your invitation batch. Create inspection checklists covering text accuracy, color consistency, alignment, and finishing quality. Review each invitation systematically rather than relying on random sampling.
Text proofreading requires multiple review stages to catch all potential errors. Check spelling, grammar, dates, times, locations, and contact information carefully. Have multiple people review the text independently to catch errors that individual reviewers might miss. Pay particular attention to names, addresses, and numerical information.
Color consistency becomes particularly important when printing invitations in batches over multiple sessions. Printer ink levels, paper variations, and environmental conditions can affect color reproduction. Print all invitations using the same ink cartridges when possible, and store printed materials in consistent environmental conditions.
Alignment and cutting precision affect professional appearance significantly. Use cutting guides or templates to ensure consistent dimensions across all invitations. Check that text and design elements align properly within borders and that no critical information gets cut off during trimming.
Timeline Planning for Production
Effective timeline planning prevents rushed production that compromises quality. Allow adequate time for each production stage, including design finalization, material procurement, printing, assembly, and quality control reviews. Rush jobs often result in errors or substandard results that reflect poorly on the celebration.
Design finalization typically requires 1-2 weeks, including review cycles with the bride and other stakeholders. Allow time for revisions and approvals before moving to production phases. Establish clear approval processes to avoid last-minute changes that disrupt production schedules.
Material procurement may require additional time, particularly for specialty papers or embellishments that aren’t readily available locally. Order materials with buffer time for delivery delays or the need to reorder due to damage or quantity miscalculations.
Production phases require realistic time estimates based on invitation complexity and quantity. Simple designs might allow 20-30 invitations per hour, while complex handmade designs might require 15-20 minutes per invitation. Include time for breaks, meals, and the inevitable slowdown that occurs with repetitive tasks.
Quality control and packaging require additional time that’s often underestimated. Plan at least one full day for final inspection, addressing, and preparation for mailing. This buffer time allows for the correction of any issues discovered during final review.
How Do You Address and Mail Your Handmade Bridal Shower Invitations?
Proper addressing and mailing procedures ensure your beautiful handmade invitations reach guests in perfect condition while following appropriate etiquette guidelines. Bridal shower invitation examples demonstrate various addressing styles that maintain formality while reflecting the celebration’s tone.
Proper Addressing Etiquette and Formatting
Traditional addressing etiquette creates elegant, respectful presentations that honor both hosts and guests. Begin with the host’s return address in the upper left corner, using complete names and addresses without abbreviations when possible. “Ms. Sarah Johnson” appears more formal than “S. Johnson,” while “Street” looks more elegant than “St.”
Guest addressing follows established social protocols that respect relationships and family structures. Married couples receive joint addressing as “Mr. and Mrs. Jonathan Smith” or modern alternatives like “Jonathan and Maria Smith.” Same-sex couples follow identical formatting patterns. Unmarried couples living together receive separate lines: “Ms. Jennifer Brown” on the first line and “Mr. Michael Davis” on the second line.
Children’s names appear on the invitation when they’re specifically invited to the celebration. List parents’ names on the first line, followed by children’s names on the second line: “Mr. and Mrs. Robert Wilson” and “Emma and James Wilson.” For children over 18 living at home, send separate invitations to maintain proper etiquette.
Professional titles deserve recognition in formal addressing. “Dr. Patricia Adams” or “Judge William Harrison” acknowledge professional achievements. Military titles follow similar patterns: “Captain Jennifer Martinez” or “Colonel and Mrs. David Thompson.” When both spouses hold titles, list them individually: “Dr. Sarah Brown and Dr. Michael Brown.”
International addressing requires research into local customs and postal requirements. Some countries prefer family names first, while others follow Western conventions. Include country names in capital letters on the final line, and research postal code formatting requirements for proper delivery.
Envelope Selection and Coordination
Envelope selection significantly impacts first impressions and overall presentation quality. Choose envelopes that coordinate with the invitation colors while maintaining sufficient contrast for address readability. Colored envelopes create visual impact but require careful color coordination to avoid clashing with invitation designs.
Standard envelope sizes accommodate common invitation dimensions without requiring custom orders or premium postage rates. A1 envelopes (3.625″ x 5.125″) work perfectly for 4.25″ x 5.5″ invitations, while A7 envelopes (5.25″ x 7.25″) accommodate 5″ x 7″ invitations comfortably. Ensure adequate clearance for thick invitations with embellishments.
Envelope quality affects durability during mailing and handling. Choose envelopes with sufficient weight (at least 70 GSM) to protect the invitation contents and maintain a professional appearance throughout the mailing process. Higher quality envelopes resist tearing, provide better protection, and create a more substantial feeling package.
Consider envelope security features for valuable or elaborate invitations. Self-sealing envelopes eliminate moisture requirements and ensure consistent sealing. Security features like patterned interiors prevent contents from showing through envelopes, maintaining surprise and privacy during delivery.
Envelope liners add luxury touches that create memorable unboxing experiences. Cut liners slightly smaller than envelope interiors to prevent interference with sealing. Choose coordinating papers or patterns that complement the invitation designs without overwhelming the overall presentation.
Postage Calculations and Mailing Timeline
Accurate postage calculations prevent returned mail and ensure timely delivery. Standard letter rates apply to invitations weighing one ounce or less in standard envelope sizes. Heavier invitations, oversized envelopes, or thick embellishments may require additional postage or different rate classifications.
Visit local post offices with sample invitations to determine exact postage requirements. Postal workers can weigh samples and recommend appropriate postage options. Hand-cancellation services prevent machine processing that might damage delicate invitations, though this service typically requires additional fees.
Consider postage aesthetics as part of the overall invitation presentation. Custom stamps coordinate with celebration themes and create cohesive design presentations. Forever stamps provide rate protection against postal increases between purchase and mailing dates.
International mailing requires significantly more time and different postage rates. Research international mailing requirements early in the planning process to ensure adequate time for delivery. Some countries have restrictions on certain materials or require customs declarations for packages exceeding specific values.
Digital Delivery Options and Alternatives
Digital bridal shower invitations offer modern alternatives that provide instant delivery, cost savings, and environmental benefits. Email invitations work well for tech-savvy guest lists and allow for easy RSVP tracking through integrated response systems.
Professional digital invitation platforms like Paperless Post, Evite, or Greenvelope provide sophisticated design options that rival traditional printed invitations. These platforms offer tracking capabilities, automatic reminders, and integrated RSVP management that simplifies event planning.
Social media integration allows invitation sharing through private Facebook events or Instagram posts. These methods work particularly well for casual celebrations or younger guest demographics comfortable with social media communication. Ensure privacy settings protect guest information and celebration details.
Hybrid approaches combine digital convenience with physical keepsakes. Email digital invitations for immediate communication, followed by printed copies as formal keepsakes. This approach provides quick response capabilities while maintaining traditional invitation experiences that guests treasure.
People Also Ask
How far in advance should you make bridal shower invitations?
Send invitations 4-6 weeks before the event, or 6-8 weeks for destination celebrations or peak wedding season. Start creating them 6-8 weeks early to allow 2-3 weeks for design and production, ensuring quality results without rushing.
What size should DIY bridal shower invitations be?
Standard sizes 5″ x 7″ and 4.25″ x 5.5″ work best – they fit standard envelopes and postage rates. The larger 5″ x 7″ is ideal for photos and detailed designs, while 4.25″ x 5.5″ works well for simple, elegant designs and costs less.
Can you make digital bridal shower invitations for free?
Yes! Use free platforms like 1Invites, Adobe Express, or Google Drawings. These offer professional templates, fonts, and graphics at no cost. Free mobile apps also allow creation directly on smartphones.
How do you make bridal shower invitations without design experience?
Start with pre-designed templates on beginner-friendly platforms like 1Invites. Focus on simple, clean designs with good typography rather than complex graphics. Follow basic design principles: use 2-3 fonts maximum, maintain consistent spacing, and create visual hierarchy with text sizes.
What information must be included on bridal shower invitations?
Essential information includes: bride’s name (prominently displayed), complete date and time, full venue address with directions if needed, host information with contact details, and RSVP details with deadline and preferred response method.
How do you make bridal shower invitations match the wedding theme?
Use similar or complementary colors rather than identical matches. Incorporate consistent design motifs (florals, geometric patterns, etc.) and typography styles. Coordinate the tone and language style between both invitation suites for cohesive branding. For wedding invitation inspiration that coordinates with your bridal shower theme, browse our wedding invitation ideas.
Can you make bridal shower invitations using a smartphone?
Absolutely! Mobile apps like 1invites and Adobe Express offer full design capabilities with touch-optimized interfaces. Smartphones excel at photo integration and allow for designing anywhere. Consider using larger screens for final detail work.
Frequently Asked Questions
Use quality 110+ GSM cardstock, limit colors to 2-3 plus neutrals, maintain consistent spacing and alignment, and invest in quality printing. Test print samples first and consider professional printing services for the best results.
Use free design platforms (1Invites, Adobe Express), buy materials in bulk, simplify designs focusing on typography and quality materials rather than expensive embellishments, and consider hybrid approaches using free design software with professional printing.
Get accurate color references from wedding planners or color swatches. Use complementary rather than identical colors, consider seasonal appropriateness, and test color reproduction on your chosen materials and printing method.
Beginners: 1Invites (most user-friendly with templates), Advanced users: Adobe Creative Suite (professional control), Free options: GIMP, Google Drawings. Choose based on your comfort level and desired quality.
Use high-resolution images (300+ DPI), plan photo placement carefully for good text contrast, edit photos for color and brightness compatibility, and test print samples to ensure quality reproduction on your chosen materials.
Use high contrast colors (black text on white/cream backgrounds), choose legible sans-serif fonts in 12+ point sizes, include all essential information in text format rather than graphics only, and consider offering large print versions when needed.
Yes! Use traditional materials like quality cardstock, rubber stamps, stencils, and hand lettering with calligraphy pens. Focus on simple, elegant compositions and practice techniques beforehand. Plan carefully since analog mistakes require starting over.
Conclusion
Creating the perfect bridal shower invitation combines thoughtful planning, creative expression, and attention to detail that honors both the bride and the celebration ahead. Throughout this comprehensive guide, we’ve explored every aspect of how to make bridal shower invitation that truly captures the essence of this special pre-wedding gathering.
Every design choice, from color selection to embellishment placement, tells a story about the bride’s personality and the relationships that matter most to her. For additional inspiration and to see these principles in action, explore these stunning bridal shower invitation designs that showcase various styles and creative approaches. You can explore beautifully crafted options and inspiration through platforms like 1Invites’ invitation templates, which offer a range of styles to match any bridal shower theme.
Actionable Implementation Framework
- Planning Phase (Week 1): Begin by gathering essential information, including final guest count, the bride’s style preferences, celebration theme details, and realistic budget parameters. Create detailed project timelines that account for design development, material procurement, production time, and mailing requirements.
- Design Development (Week 2): Focus on creating or selecting templates that align with the bride’s personality and celebration theme. Experiment with color combinations, typography choices, and layout options while maintaining a clear hierarchy for essential information.
- Material Preparation (Week 3): Purchase all necessary supplies, including cardstock, envelopes, embellishments, and printing materials. Test print samples using your chosen equipment and paper combinations to verify color accuracy, print quality, and material compatibility.
- Production Phase (Week 4-5): Execute final printing, cutting, assembly, and embellishment application with systematic attention to consistency and quality. Implement quality control checkpoints that catch errors early while they are still correctable.
- Addressing and Mailing (Week 6): Complete envelope addressing using appropriate etiquette guidelines and coordinate with chosen aesthetic presentations
- Follow-up (Week 7-8): Track RSVP responses and maintain guest communication throughout the response period. Send gentle reminders to guests who haven’t responded by the deadline dates, and coordinate final details with caterers, venues.
Reference
- “Is My Paper Safe to Print On? – Using Cardstock,” Retrieved July 9, 2025. Output Room Frequently Asked Questions, College of Design Technology Services, University of Oregon.
- Retrieved July 9, 2025. Comprehensive Procurement Guidelines for Paper and Paper Products, U.S. Environmental Protection Agency.